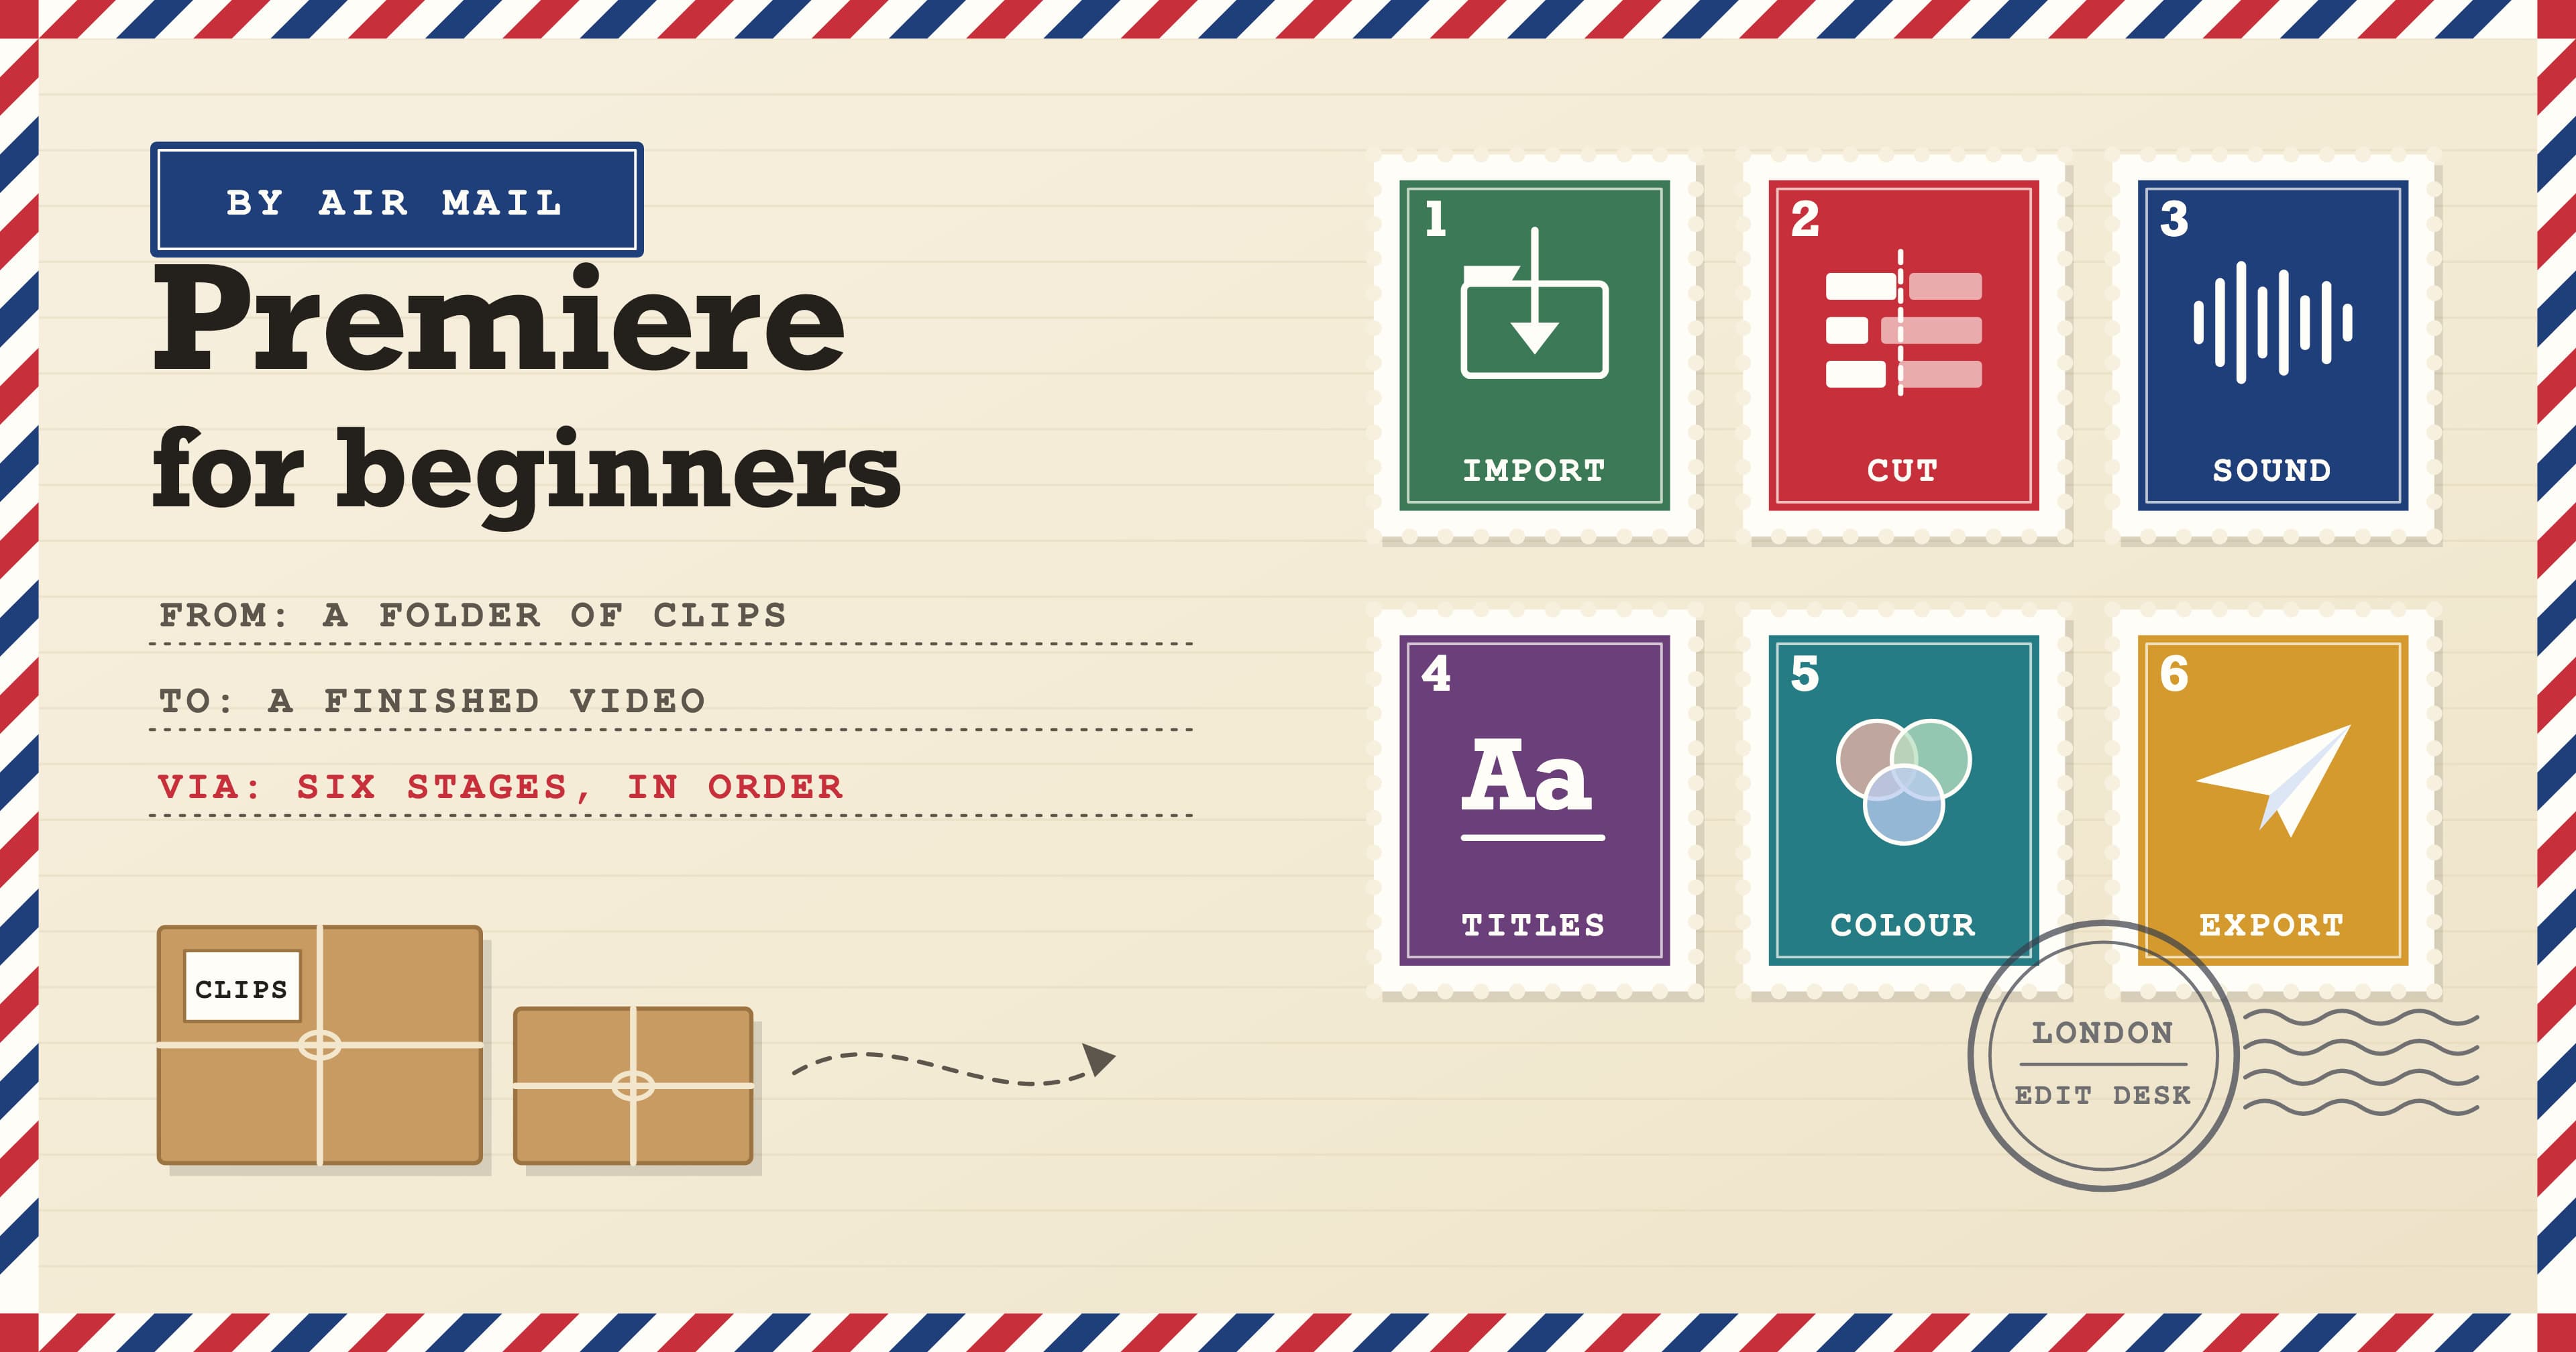
Six stages. Every edit in Premiere, from a 15-second Reel to a feature film, moves through the same six: import, cut, sound, titles, colour and export. Learn them in that order, get each one good enough rather than perfect, and you can turn a folder of phone clips into a finished, captioned video in your first afternoon. Everything else the app can do is a refinement of one of those six.
That’s the whole beginner workflow. Premiere (formerly Premiere Pro, until Adobe dropped the “Pro” with version 26) is the same editor it always was, and the order of work hasn’t changed. Below we walk through each stage, then trace one real-world style job, a 60-second vertical video for a bakery, from the first import to the file you post.
What are the six stages of editing in Premiere?
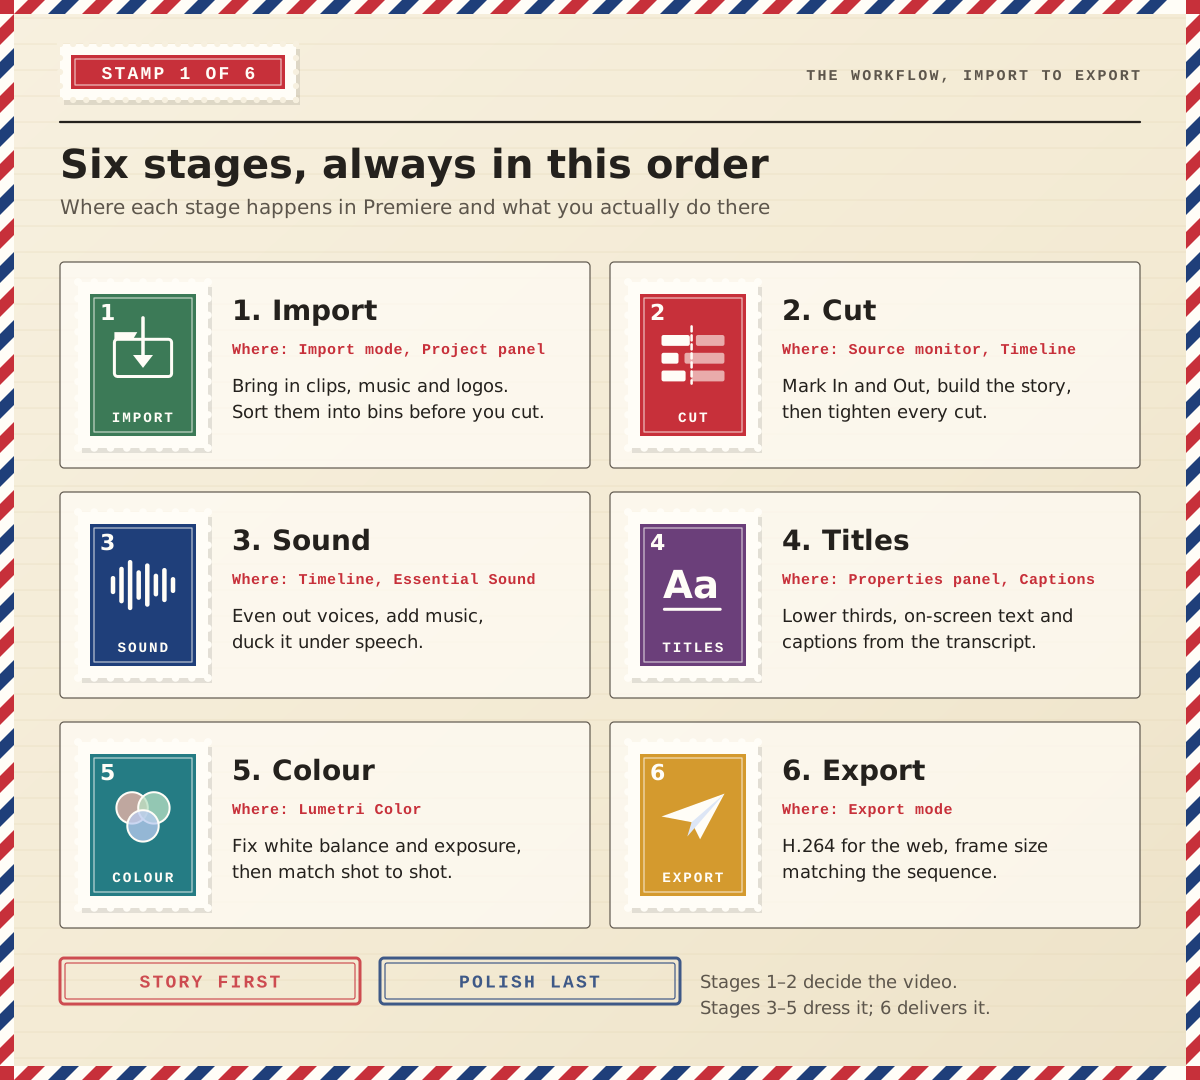
Import. A new project opens in Import mode, where you pick files and Premiere can build a sequence for you. Afterwards, sort everything into bins in the Project panel: Interview, B-roll, Music, Graphics.
Cut. Watch clips in the Source monitor, mark the part you want with In and Out points, and add it to the Timeline. Build the story first, then tighten it.
Sound. Even out voice levels, add music and lower it under speech. Viewers forgive a slightly soft shot; they scroll past bad audio.
Titles. Add lower thirds and on-screen text in the Properties panel, and generate captions from the transcript.
Colour. Correct white balance and exposure with Lumetri Color, then make neighbouring shots match.
Export. In Export mode, choose where the video is going. H.264 suits almost everything online.
Our rule of thumb is story first, polish last. Stages one and two decide what the video is about; three to five dress it; six delivers it. Before you touch sound or colour, play the rough cut with your eyes closed, then with the sound off. If it makes sense both ways, the story is ready for polish. Grading shots you later cut is the most common way beginners lose an afternoon.
Which panels do beginners actually need?
Four panels do most of the work, and it helps to think of them as a sorting office. Clips sit on the shelf, get inspected, are assembled and then go out the door.
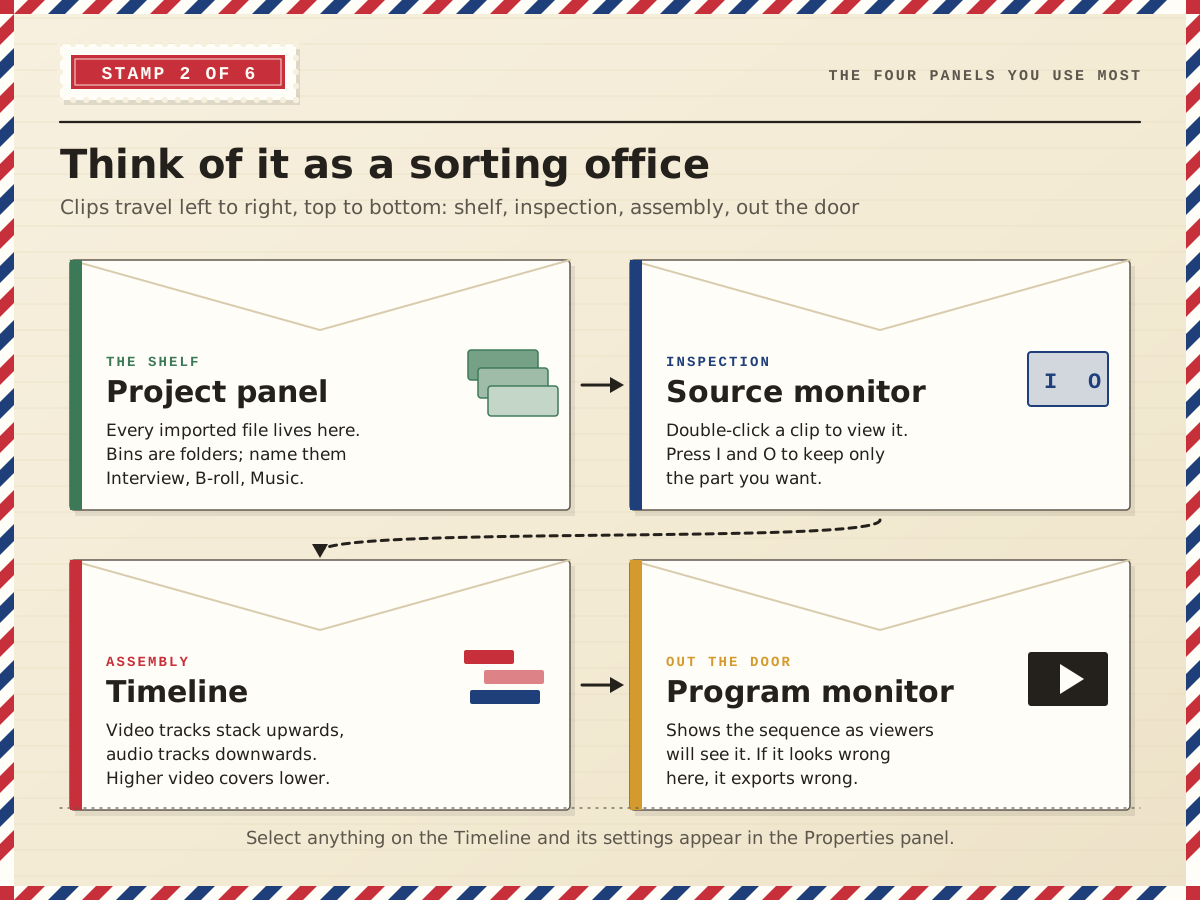
The Project panel holds every file you import. The Source monitor lets you preview a clip and keep only the part you want. The Timeline is where the edit is built, with video tracks stacking upwards (higher tracks cover lower ones) and audio tracks below. The Program monitor shows what your audience will see. Select anything on the Timeline, a clip, a title or a sound, and its settings appear in the Properties panel, which is the friendliest place for a beginner to adjust things.
A worked example: one 60-second bakery video
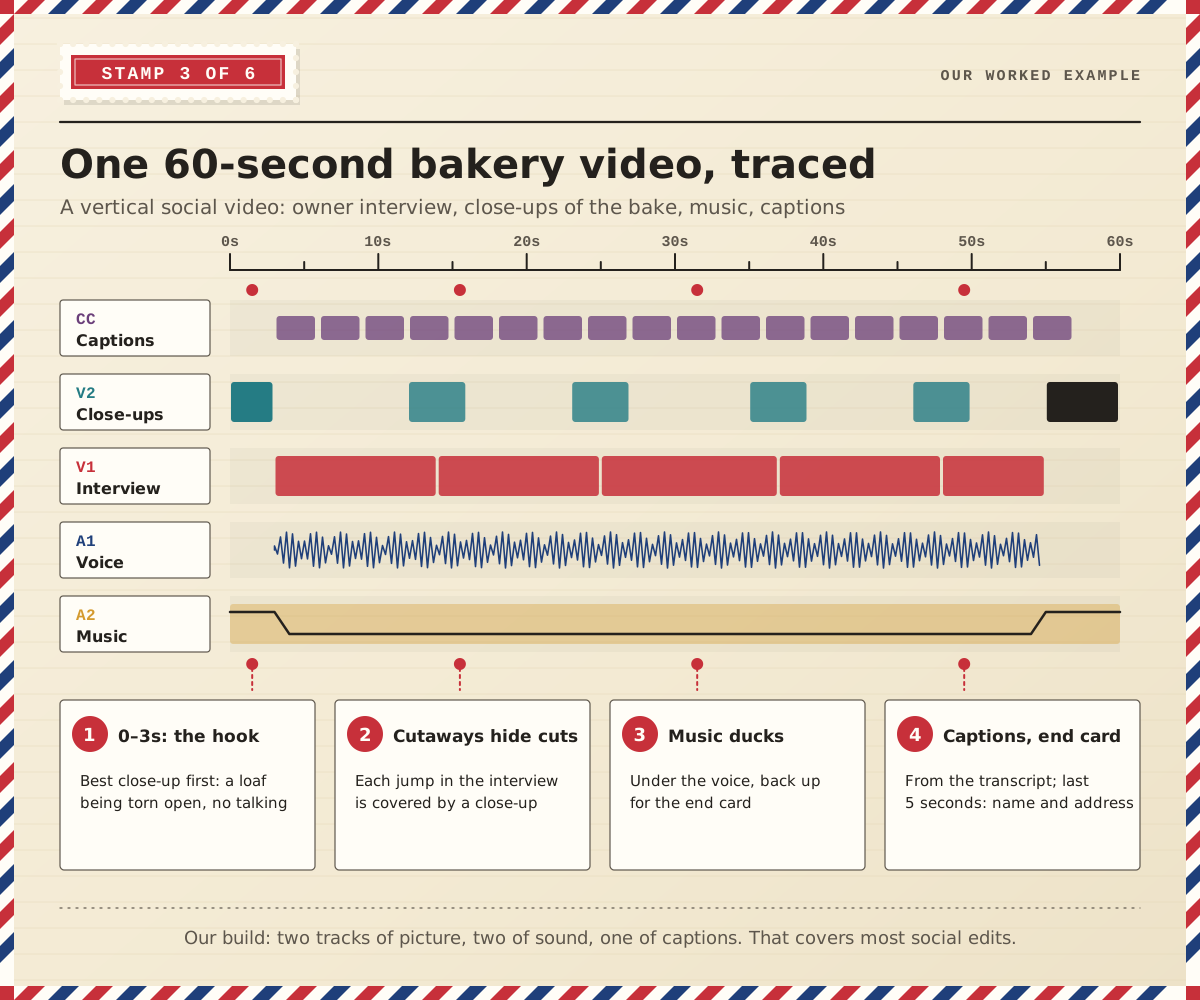
Here’s how we’d build a typical marketing job: a vertical social video for a local bakery, with an interview with the owner, close-ups of dough, the oven and a finished loaf, a music track and captions. It’s our example, but it covers the shape of most social edits.
Import and sort (10 minutes). Bring everything in and make three bins. Rename the best take of the interview so you can find it again.
Rough cut on V1. Lay the interview on the Timeline and keep only the sentences that tell the story: what we bake, why it takes two days, come and try it. With text-based editing you can do this by deleting lines from the transcript, and Premiere can find filler words and long pauses for you.
Cutaways on V2. Every cut in the interview leaves a visible jump. Cover each one with a close-up on the track above. Open on the best close-up, a loaf being torn open, for the first three seconds, because that’s when people decide whether to keep watching.
Sound. Tag the interview as Dialogue and the track as Music in the Essential Sound panel, then let auto-ducking lower the music whenever the owner speaks. If the room was echoey, Essential Sound and Enhance Speech can clean it up.
Captions and end card. Most people watch social video without sound, so create captions from the transcript and style them once. Finish with a five-second card showing the bakery’s name and address.
Colour. A quick white balance on the interview so the owner doesn’t look orange under the kitchen lights, then match the close-ups to it.
Export. H.264, frame size matching the sequence, captions burned in. Watch the exported file on a phone before you post it.
That’s two tracks of picture, two of sound and one of captions. In our view, that layout handles nine out of ten jobs a marketer or new editor will be given in their first months.
Should you edit in 16:9 or vertical?
If a video has to work on YouTube, a website and Instagram, edit one 16:9 master first, then use Sequence > Auto Reframe Sequence. It builds a new 9:16 or 1:1 sequence that follows the action in each shot and leaves your master untouched. Choose the Slower Motion setting for talking heads, then check every shot and nudge any frame where the subject drifts out.
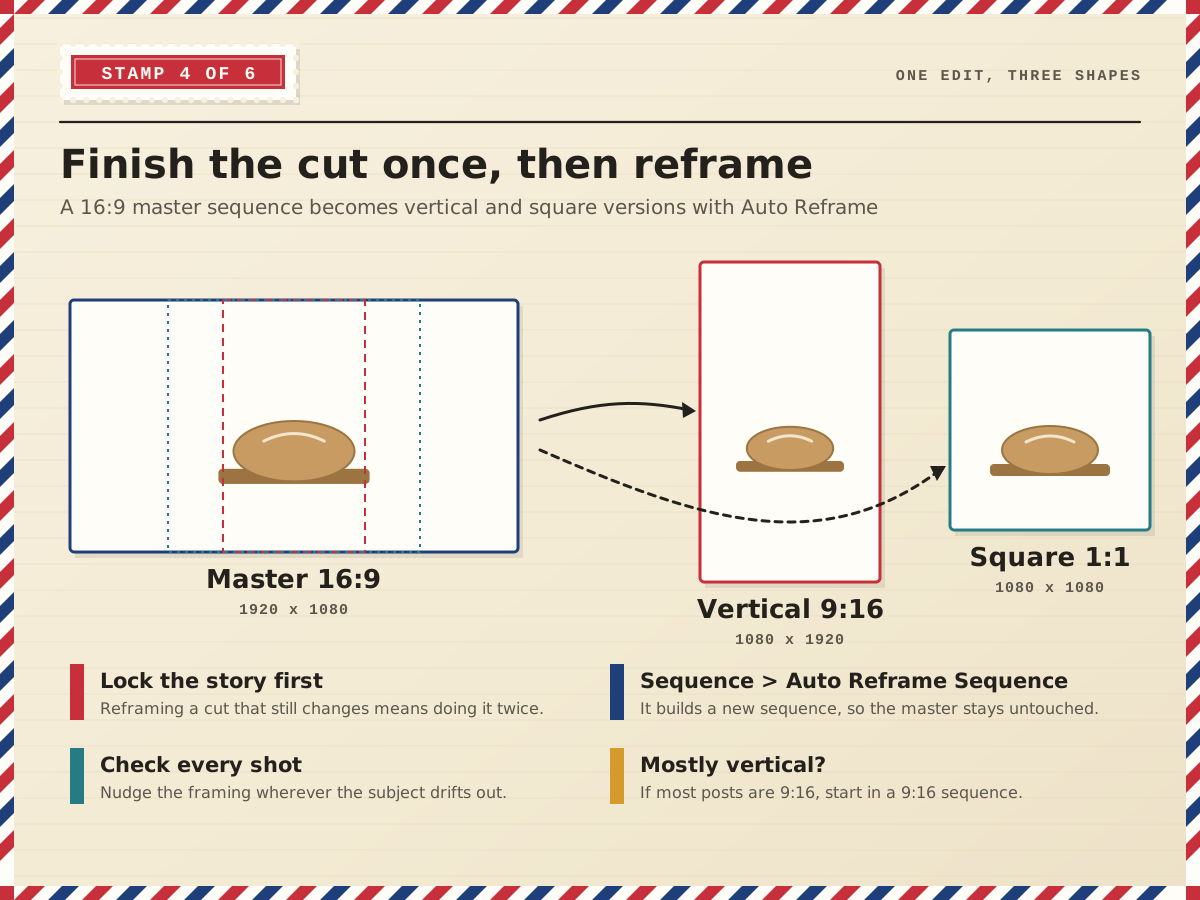
Our decision rule: lock the story before you reframe, because reframing a cut that’s still changing means doing it twice. And if most of your videos only ever go to Reels, TikTok or Shorts, skip the master and start in a 9:16 sequence (1080 x 1920) so you frame for the phone from the first cut.
Which export settings should a beginner use?
You don’t need to understand codecs to get a clean file. The H.264 format with the Match Source, Adaptive High Bitrate preset keeps your sequence’s frame size and frame rate, which is the safe default. Here’s how we’d set up the common jobs:
Where it’s going | Sequence shape | Export starting point | Check before posting |
|---|---|---|---|
Reels, TikTok, Shorts | 9:16, 1080 x 1920 | H.264, Match Source; captions burned in | Watch it on a phone, with the sound off |
YouTube | 16:9, 1920 x 1080 | The YouTube destination in Export mode, or H.264 to a file | Upload the caption file rather than burning it in |
Website or email | 16:9 or 1:1 | H.264 with a lower bitrate for a smaller file | File size, and how it looks on a laptop |
Client review draft | Same as the final | H.264, lower bitrate; Send to Media Encoder if there are several | That the end card and spellings are right |
Is Premiere only for video editors?
No, and the job market shows it. When we read the first page of UK listings on Reed that mention Premiere, 23 different ads, only 8 were dedicated video roles. The other 15 were marketing and social media executives, content creators, graphic and multimedia designers and one content publisher, all listing Premiere among the skills they wanted. Where you start depends on your role:
Marketers and social media managers: focus on stages one, two, four and six, plus Auto Reframe. Short, captioned, vertical edits are most of the job.
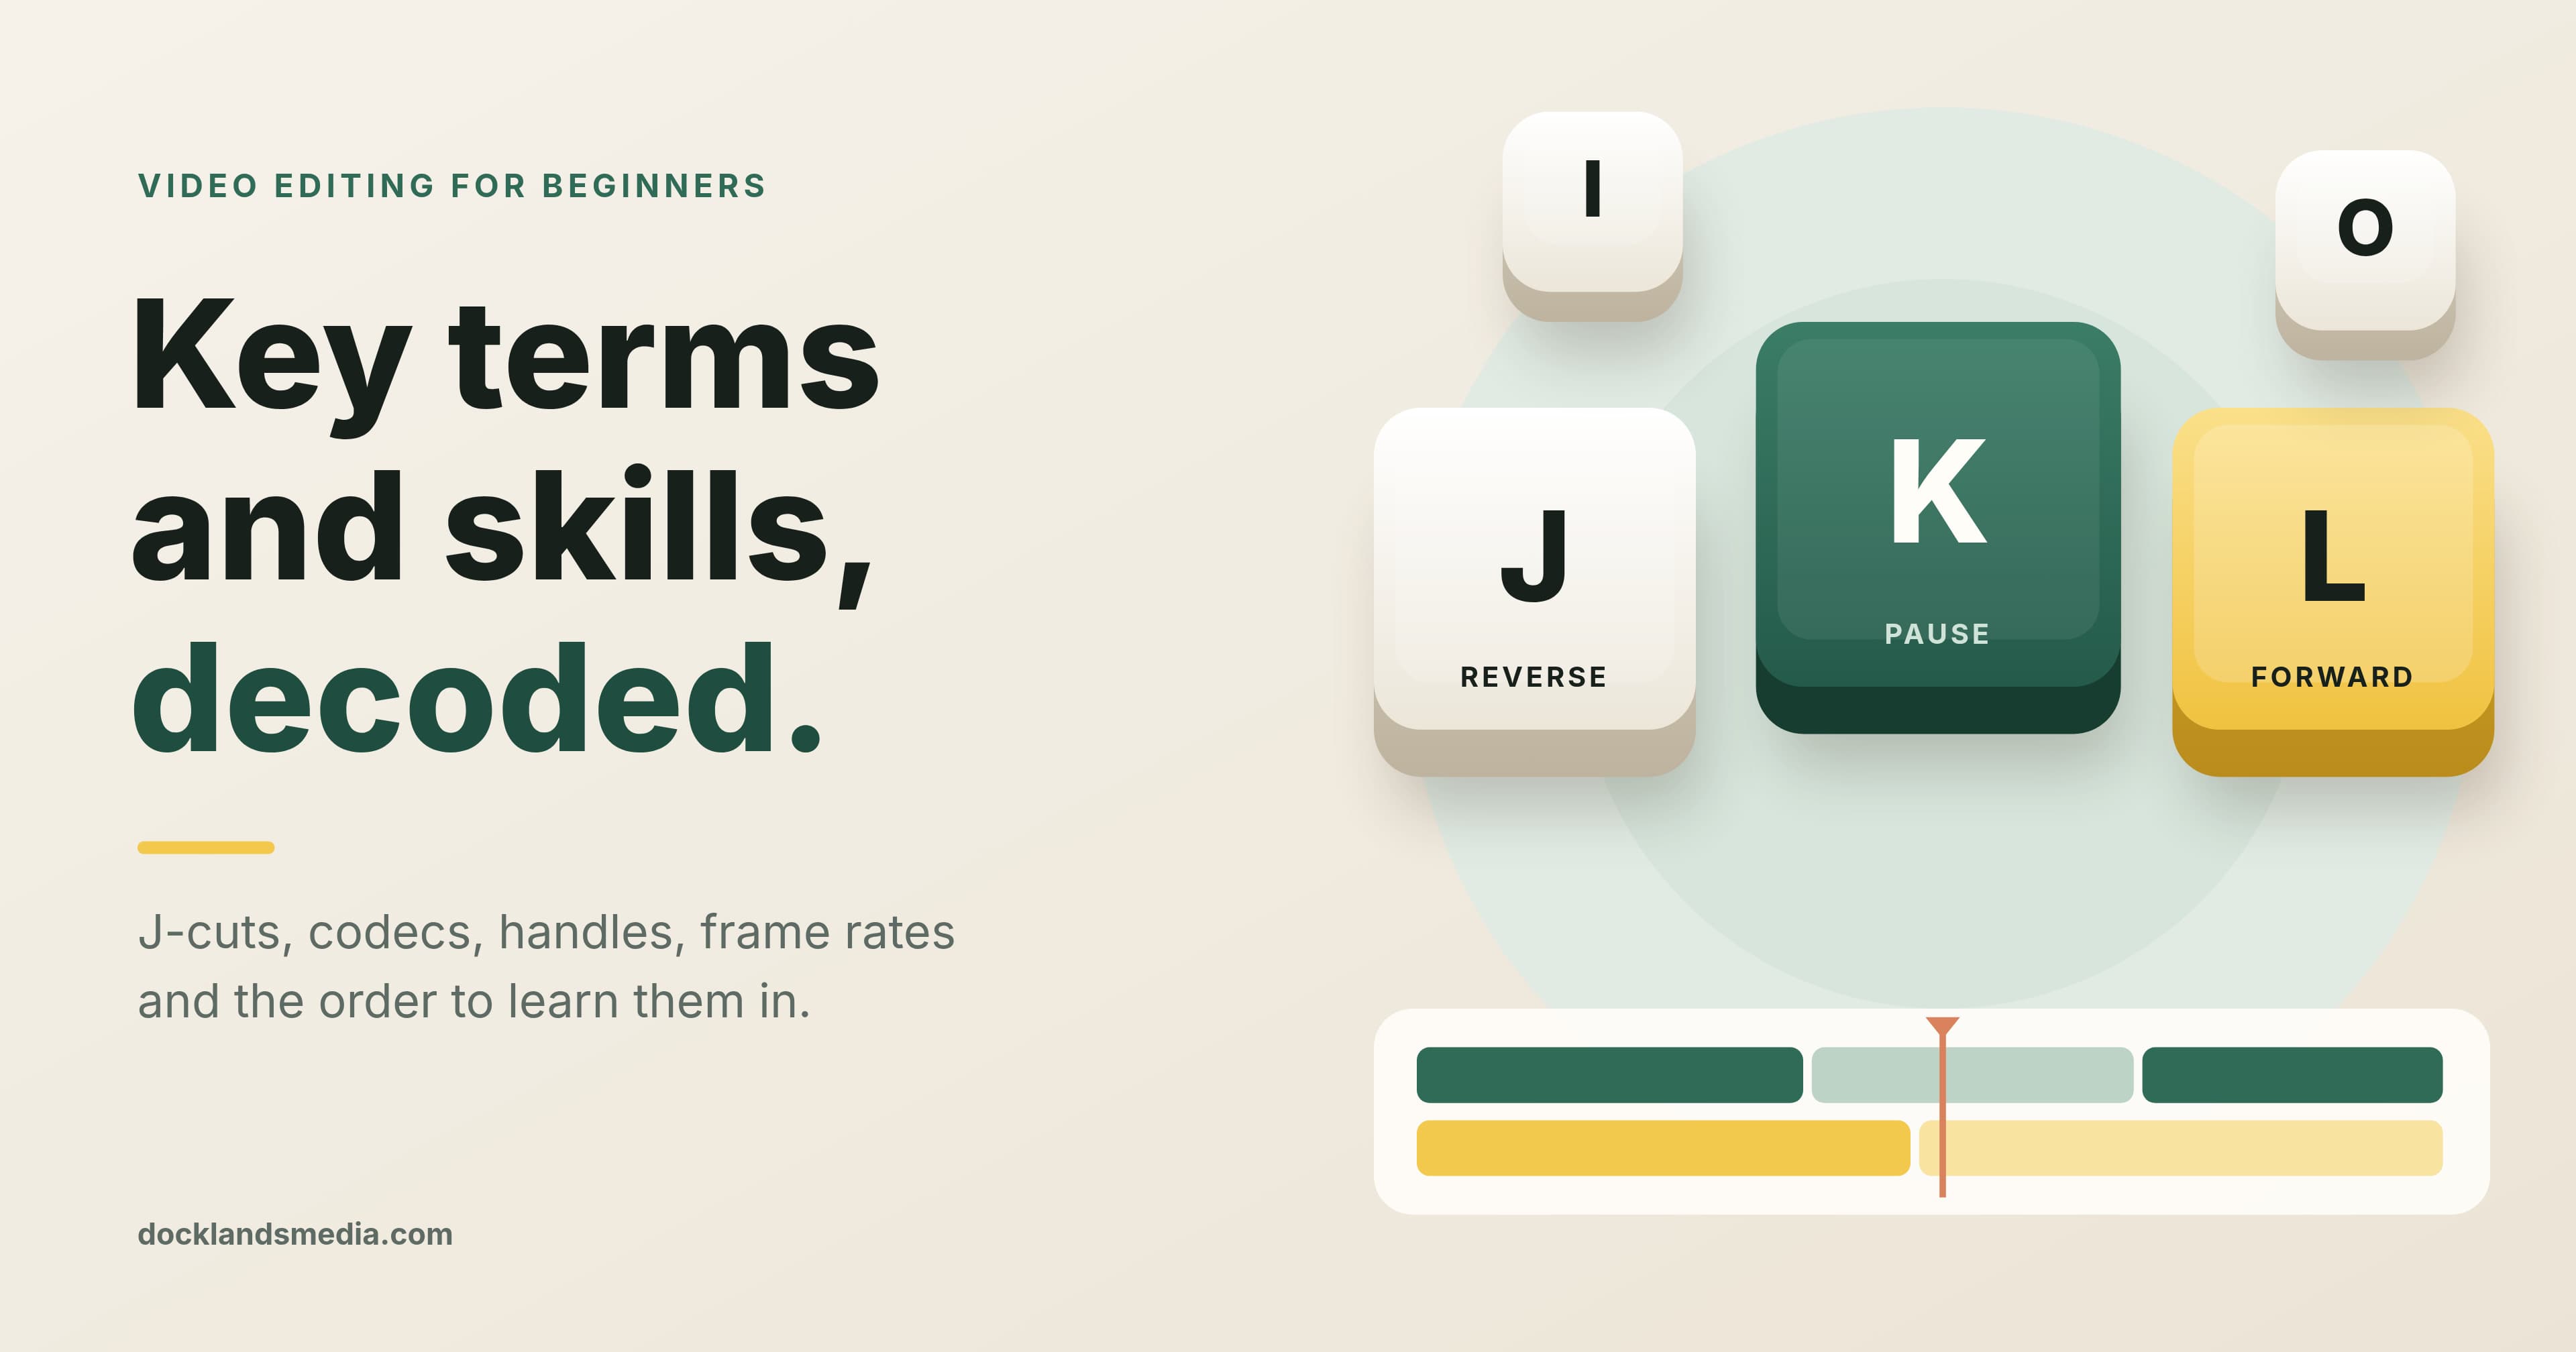
New editors: spend extra time on stage two. Trimming, pacing and J and L cuts are what make an edit feel professional.
Graphic designers adding video: titles and colour will feel familiar; sound is usually the new skill. When you want animated graphics, here’s where Premiere ends and After Effects begins.
Still choosing an editor? Our comparison of Premiere and DaVinci Resolve covers the trade-offs.
What goes wrong for beginners, and how do you fix it?
Most early problems are settings, not skills. Before you search for answers, try the first fix in this checklist.
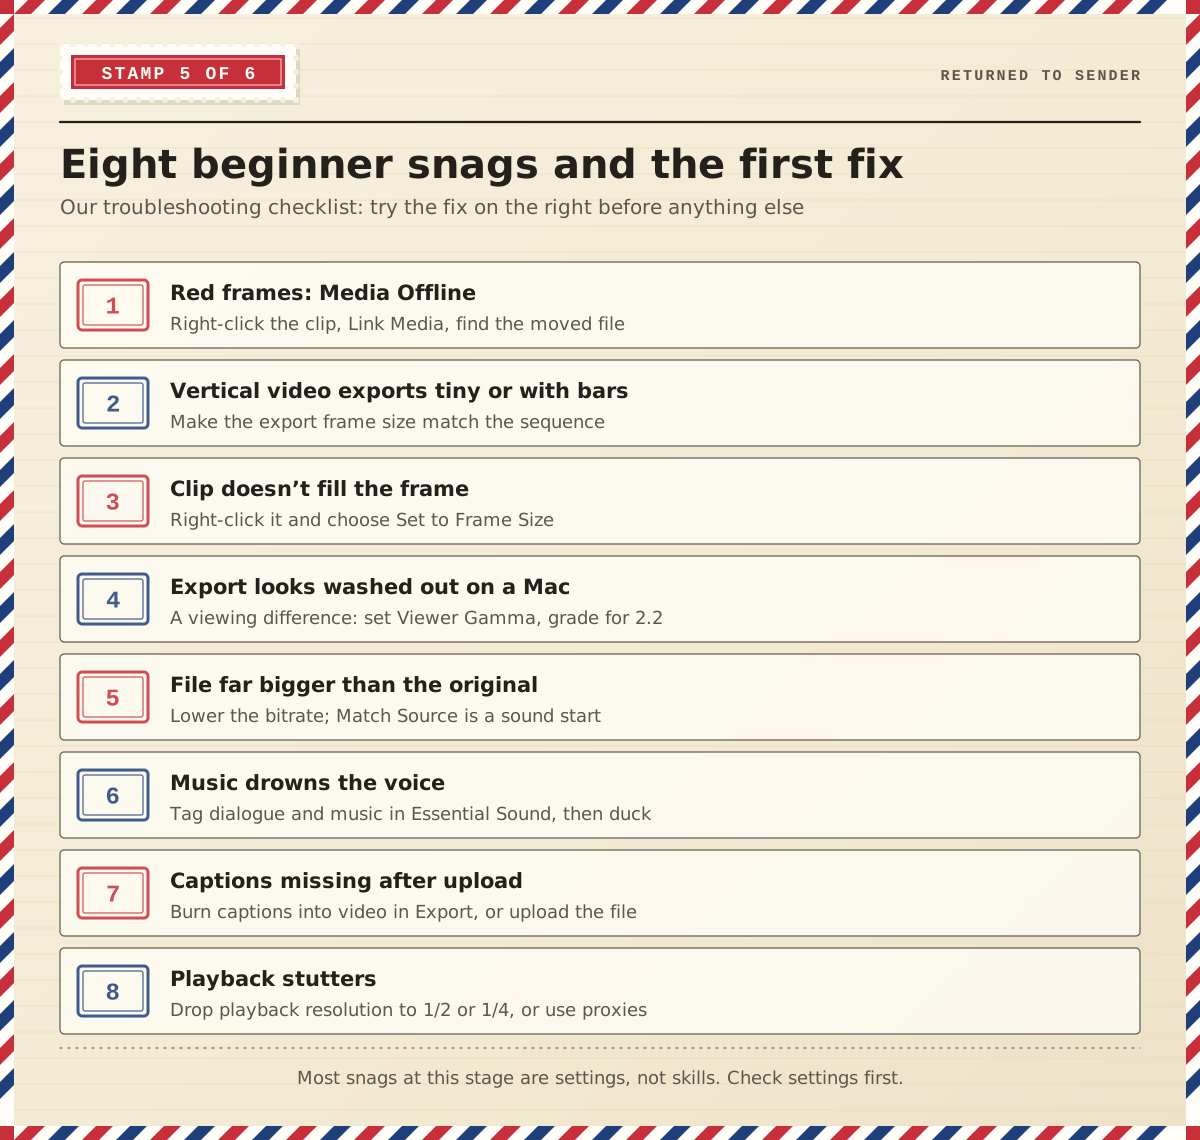
Two of these catch almost everyone. Red “Media Offline” frames mean a file was moved or renamed after import: right-click it, choose Link Media and point Premiere to the file’s new home. And an export that looks washed out on a Mac usually isn’t broken. Macs display video with a different gamma from the one Premiere previews with, so set Viewer Gamma in Lumetri Color’s settings to match your audience, using 2.2 for web video.
How to learn Premiere step by step
Each stage above maps onto our course outlines, so you can see exactly where a skill is taught.
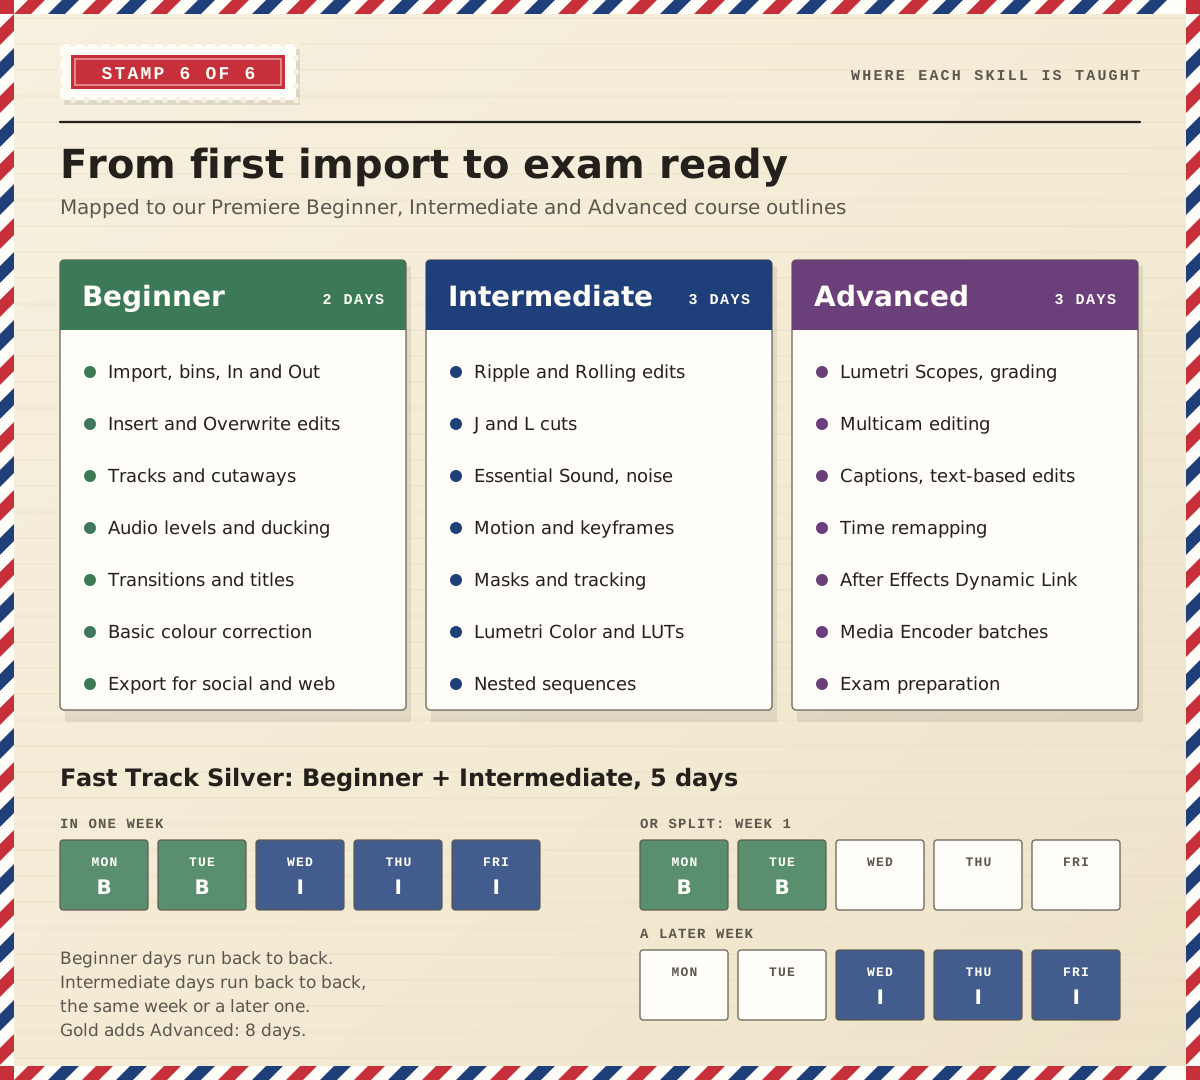
The two-day Premiere Beginner course covers the full import-to-export workflow in this post: bins and the Media Browser, Insert and Overwrite edits, multiple tracks and cutaways, audio levels and ducking, transitions, titles, basic colour correction and exporting the finished video. Three days of Intermediate add the trimming tools, J and L cuts, Essential Sound, keyframed motion, masking and tracking and Lumetri Color. Advanced, also three days, covers scopes and grading, multicam, captions and text-based editing, time remapping and Dynamic Link to After Effects.
The Premiere Fast Track Silver combines Beginner and Intermediate over five days, and the Fast Track Gold adds Advanced for eight. The Beginner days run back to back, and the Intermediate days can follow in the same week or a later one. Both Fast Tracks prepare you to take and pass the Adobe Certified Professional exam in Premiere at the end of the course. If you also want motion graphics, the Video Bundle Beginner pairs Premiere Beginner with After Effects Beginner over four days.
Learn Premiere with Docklands Media
Docklands Media is an Adobe authorised training partner, and Ozgur, who runs it, is an Adobe Certified Instructor. We’re also authorised by Autodesk, Maxon, Blackmagic Design and Certiport. Courses run in London or live online, and every course ends with a certificate of completion. Bring a folder of your own clips if you like: the six stages work the same on anything you shoot.