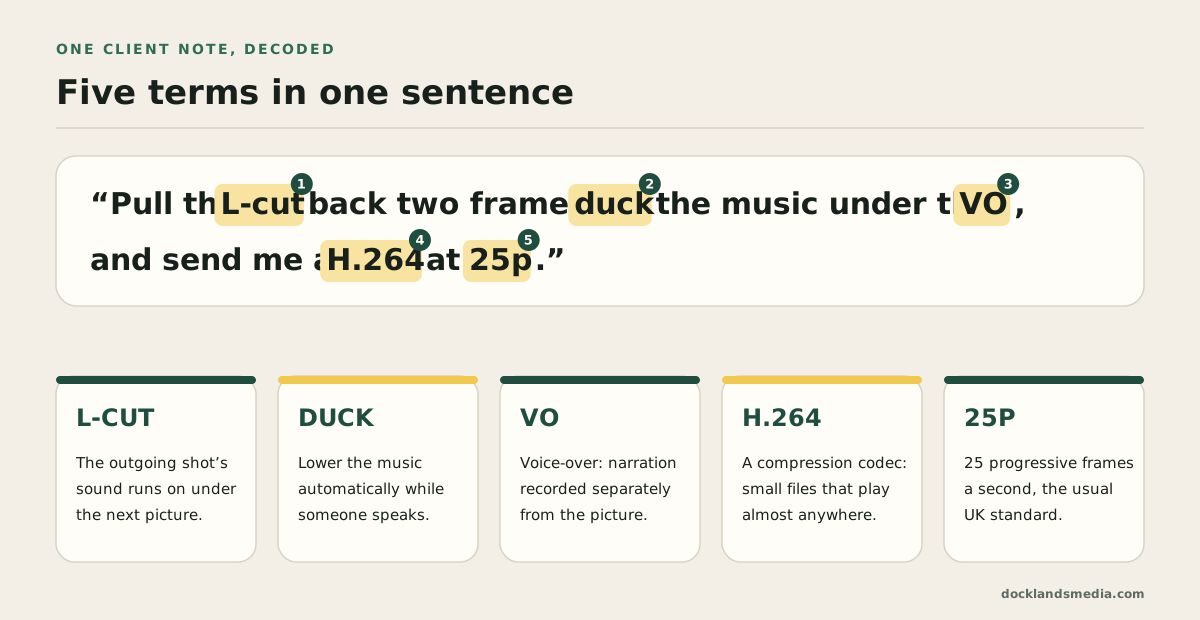
“Pull the L-cut back two frames, duck the music under the VO, and send me an H.264 at 25p.” To an editor, that is an ordinary note from a client. To someone opening a video editor for the first time, it might as well be written in code.
Video editing for beginners comes down to a small working vocabulary and five core skills: organising footage, assembling a rough cut, trimming for pace, balancing sound and exporting the right file. Learn around twenty terms in the order you meet them, and the rest of the jargon starts to make sense on its own. The words are almost identical across Premiere and DaVinci Resolve, which is why key video terminology is the first topic on day one of both our Premiere Beginner course and our DaVinci Resolve Beginner course.
Why learn the words before the buttons?
Most glossaries list terms from A to Z. That hides the useful part. Almost every editing term exists because it stops a particular mistake: footage that stutters, sound that drifts out of sync, a transition that freezes, a file the client cannot play. So rather than an alphabet, here are the terms grouped by the stage where you first need them, each paired with the problem it prevents. The grouping is our own, drawn from the questions beginners ask most in our classrooms.
Terms you meet before you make a single cut
Project, media and bins. Your project does not contain your footage. It points to files on a drive. Move or rename those files and the editor shows “Media Offline”. Bins are the folders inside the project where you sort clips. Sort the drive first and most offline-media panics never happen.
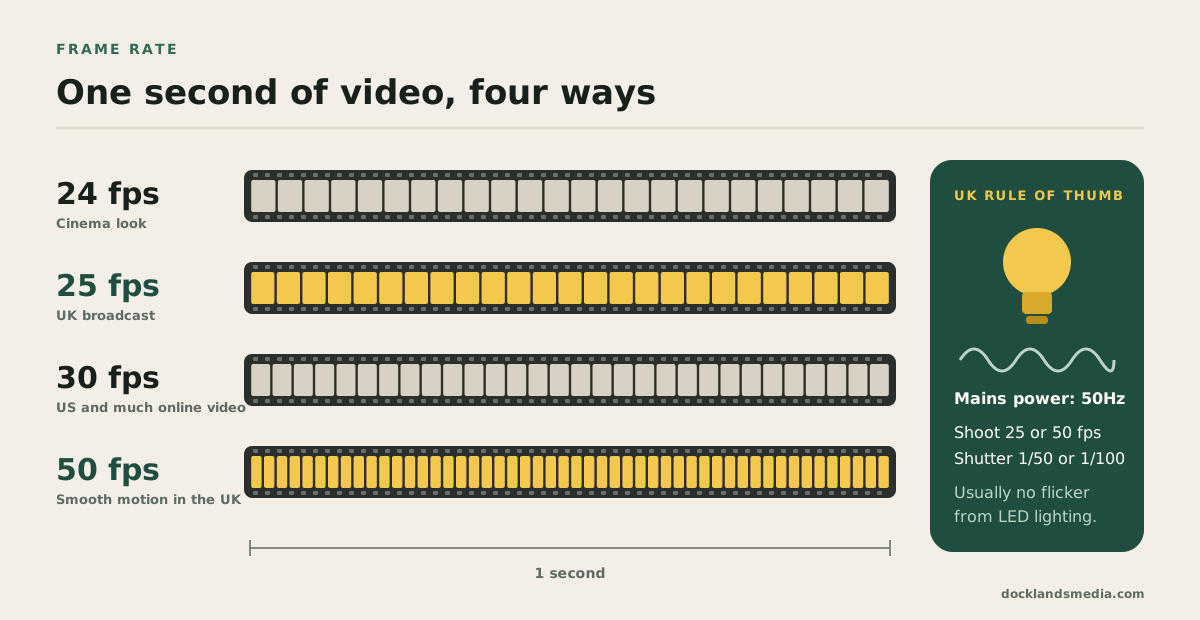
Frame rate. The number of still images shown per second (fps). Common rates are 24, 25, 30, 50 and 60. In the UK, 25 and 50 are the natural choices. Broadcast here runs at 25 frames a second, and because mains electricity is 50Hz, filming at 25 or 50fps with a shutter speed of 1/50 or 1/100 usually keeps LED and fluorescent lighting from flickering on camera. Mixing rates in one timeline is the classic cause of judder.
Resolution and aspect ratio. Resolution is the pixel size of the frame (1920×1080 for Full HD, 3840×2160 for UHD). Aspect ratio is its shape: 16:9 for landscape, 9:16 for vertical social video, 1:1 or 4:5 for some feeds. Decide the shape before you edit.
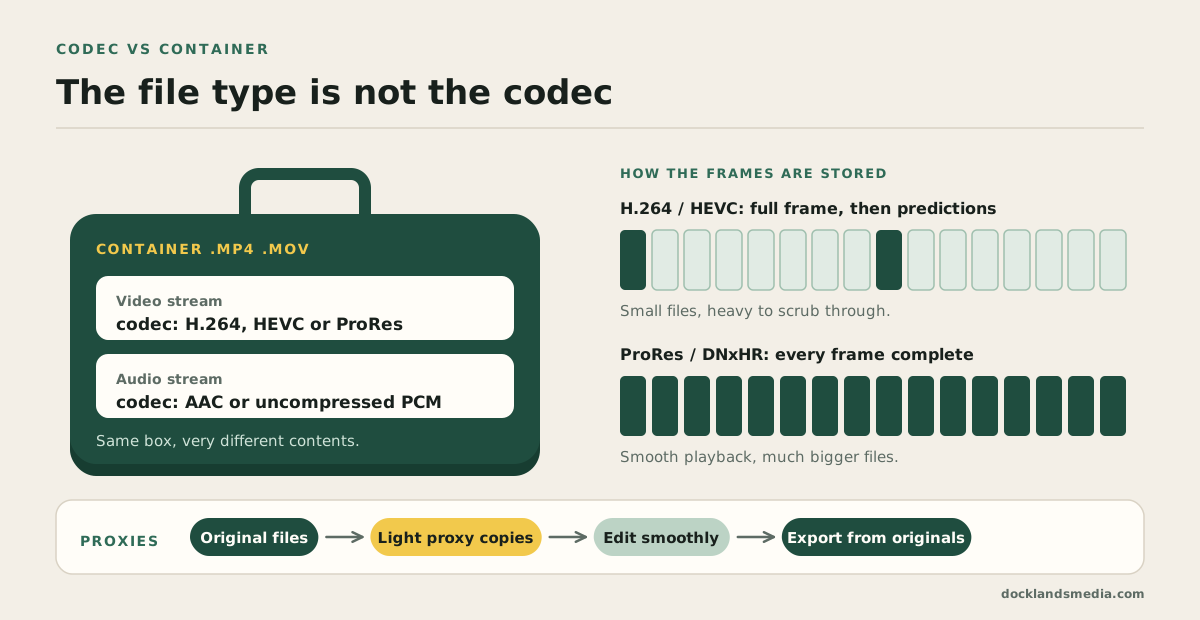
Codec and container. These are the two words beginners mix up most. The container is the file type you see, such as MP4 or MOV. The codec is how the pictures inside are compressed, such as H.264, HEVC or ProRes. H.264 and HEVC store complete frames only occasionally and predict the rest, which keeps files small but makes them heavy to scrub through. ProRes and DNxHR play smoothly but take far more space.
Proxies. Lightweight copies you edit with, while the originals are used for export. If playback stutters on a laptop, proxies are usually the fix, not a new computer.
Variable frame rate. Phones often record a frame rate that shifts slightly from moment to moment. On a long interview, the sound can creep out of sync. Converting to a constant frame rate before you edit avoids it.
Cutting vocabulary: putting shots in order
Sequence or timeline. Where the edit is built: video tracks above, audio tracks below.
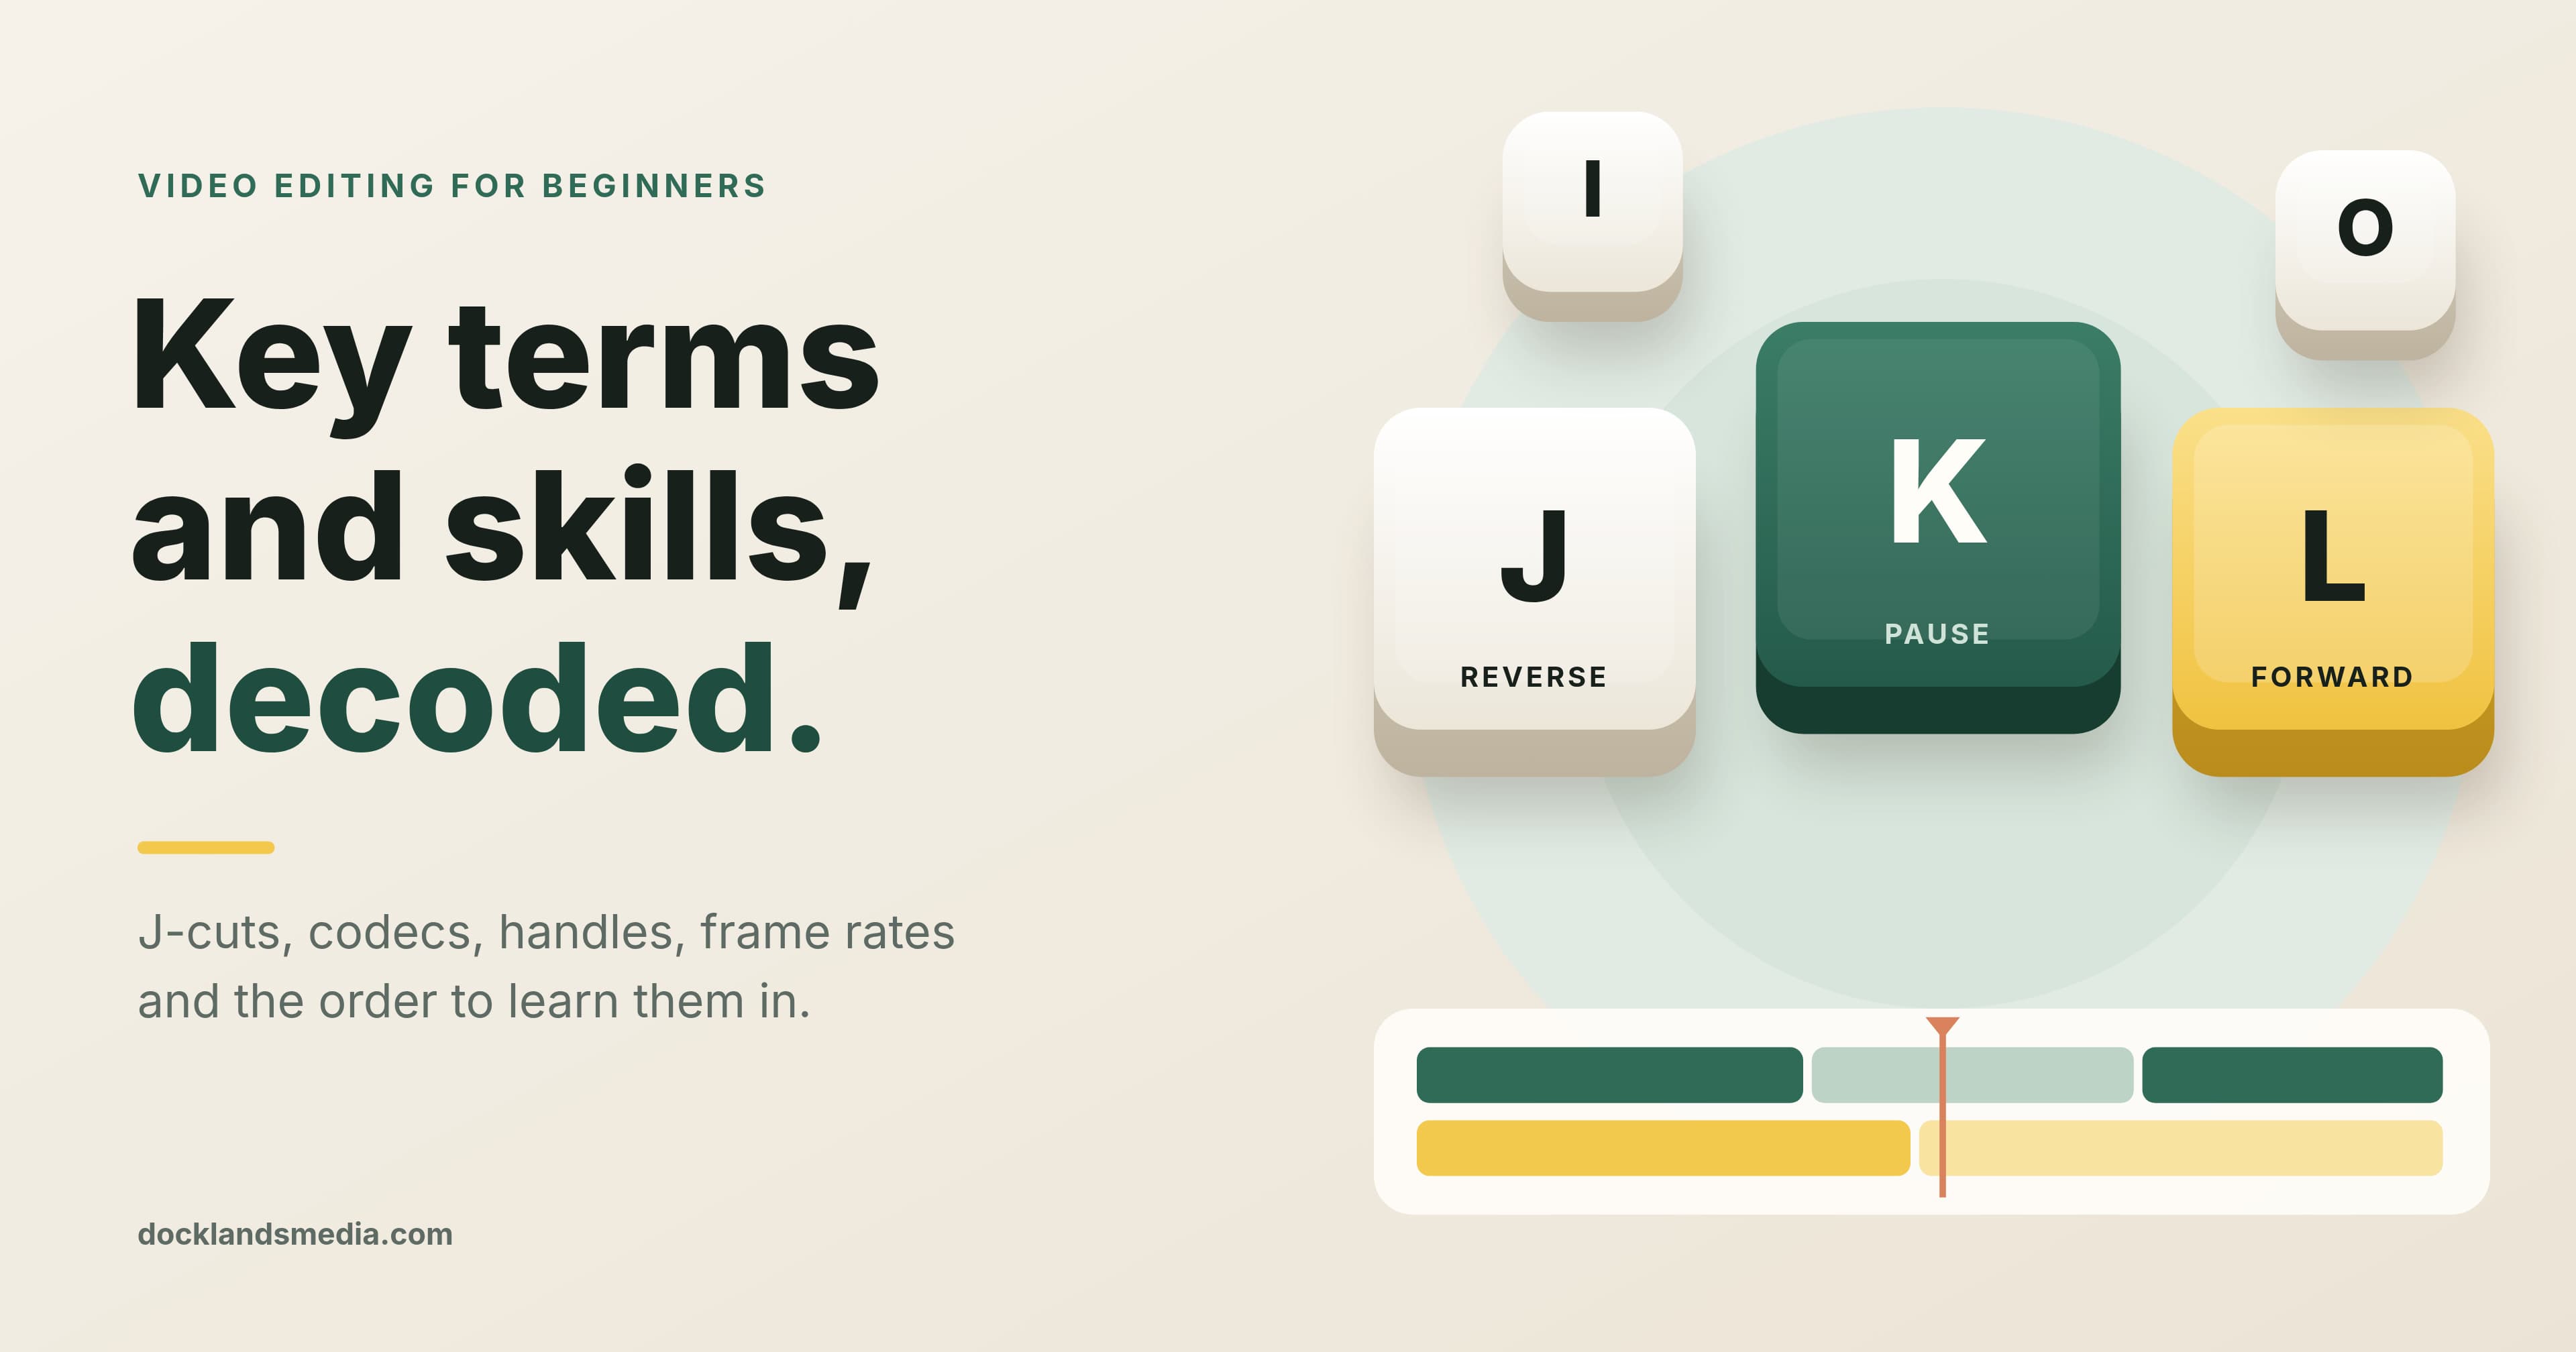
In and Out points. Marks (I and O on the keyboard in both Premiere and Resolve) that define the part of a clip you want. Set an In, an Out and a position on the timeline and you have made a three-point edit, the most efficient way to build a cut.
Insert and overwrite. An insert edit pushes everything after it along the timeline. An overwrite edit replaces whatever is underneath. Use the wrong one and every clip downstream shifts, often taking music and dialogue out of sync with each other.
Rough cut, fine cut and picture lock. The rough cut gets the story in the right order. The fine cut trims for rhythm. Picture lock means the timing will not change again, so sound and colour can be finished.
A-roll, B-roll and cutaways. A-roll carries the story, usually someone speaking. B-roll is supporting footage laid over it. A cutaway is a single B-roll shot used to hide a join, such as a cut in the middle of an interview answer. Without one, the join becomes a jump cut: fine as a style, distracting by accident.
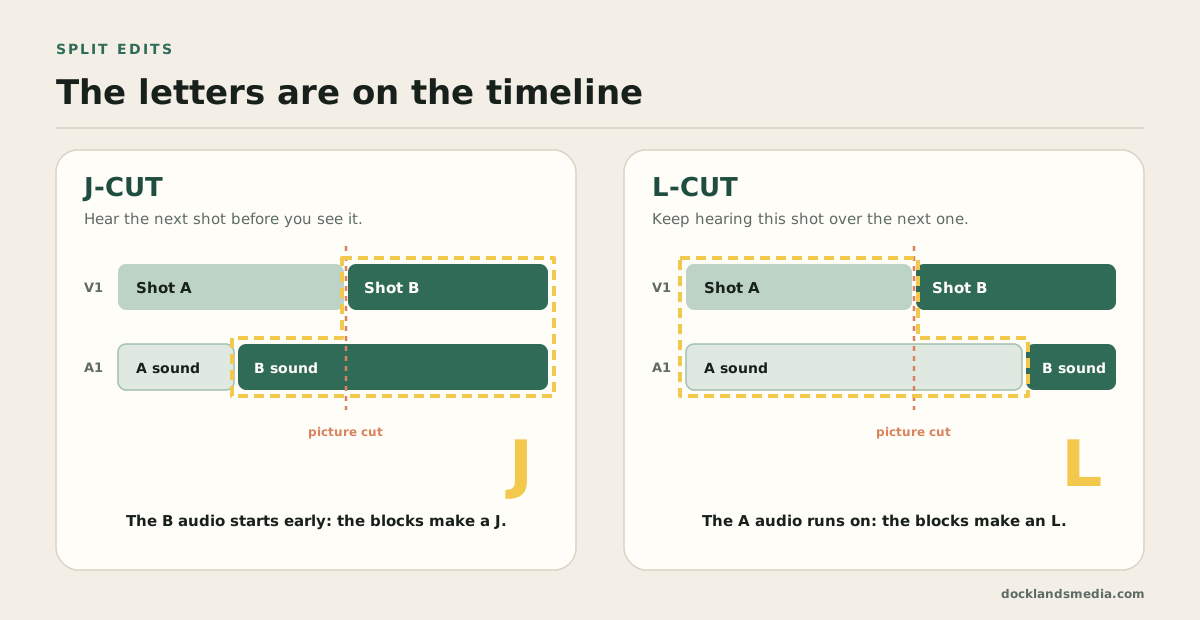
J-cuts and L-cuts. Two kinds of split edit, where sound and picture change at different moments. In a J-cut, you hear the next shot before you see it. In an L-cut, the sound of the current shot carries on over the next picture. On the timeline the audio and video blocks form the shape of the letter, which is where the names come from. They are the biggest difference between a beginner’s interview edit and a professional one.
Handles: the old term the new AI tools rely on
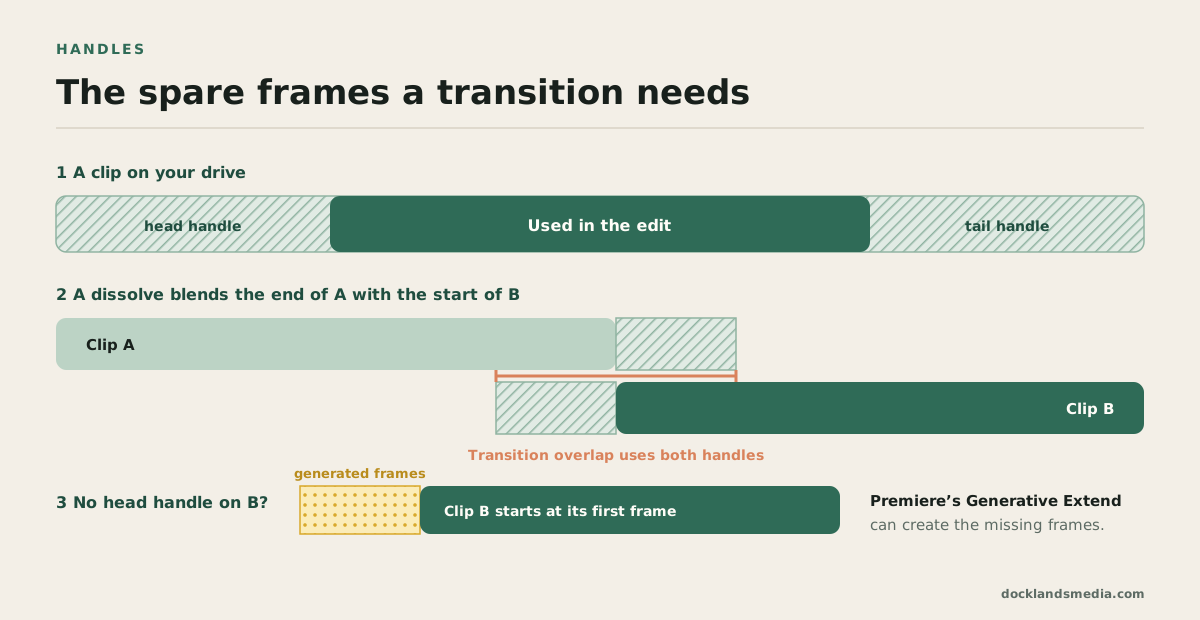
Handles are the spare frames before and after the part of a clip you have used. A cross dissolve needs them, because it blends the end of one shot with the start of the next. With no spare frames, there is nothing to blend.
Premiere’s Generative Extend can now create the missing frames when a transition needs more than a clip has. It is a good example of how the AI features work. They are named after the jobs they speed up, so you need the underlying term to judge whether the result is any good. Auto Reframe moves a landscape edit into a vertical frame, and you still need to know where the safe area is before you trust it. In Resolve, many AI tools, including Magic Mask and Voice Isolation, are part of the paid Studio version. If you are working out what the free version covers, our guide to whether DaVinci Resolve is free sets out the differences.
Sound and colour terms that make an edit look professional
Viewers forgive soft pictures sooner than bad sound, so learn these early.
Levels and clipping. Audio level is measured in decibels below full scale (dBFS). Anything that hits 0 clips and distorts, and it cannot be repaired later. Keep dialogue peaks comfortably below that.
Loudness (LUFS). A measure of how loud a whole programme feels rather than its peaks. UK broadcast delivery is built around the EBU R128 target of −23 LUFS, and online platforms adjust loudness in their own ways, so always ask which target a client needs.
Ducking. Lowering music automatically under speech. In Premiere, Auto Ducking now updates its keyframes as you trim or move clips, so it no longer needs regenerating after every change.
Room tone. A few seconds of the silent room, used to fill gaps so dialogue cuts never drop into dead air.
Keyframes. Markers that change a setting, such as volume or position, over time.
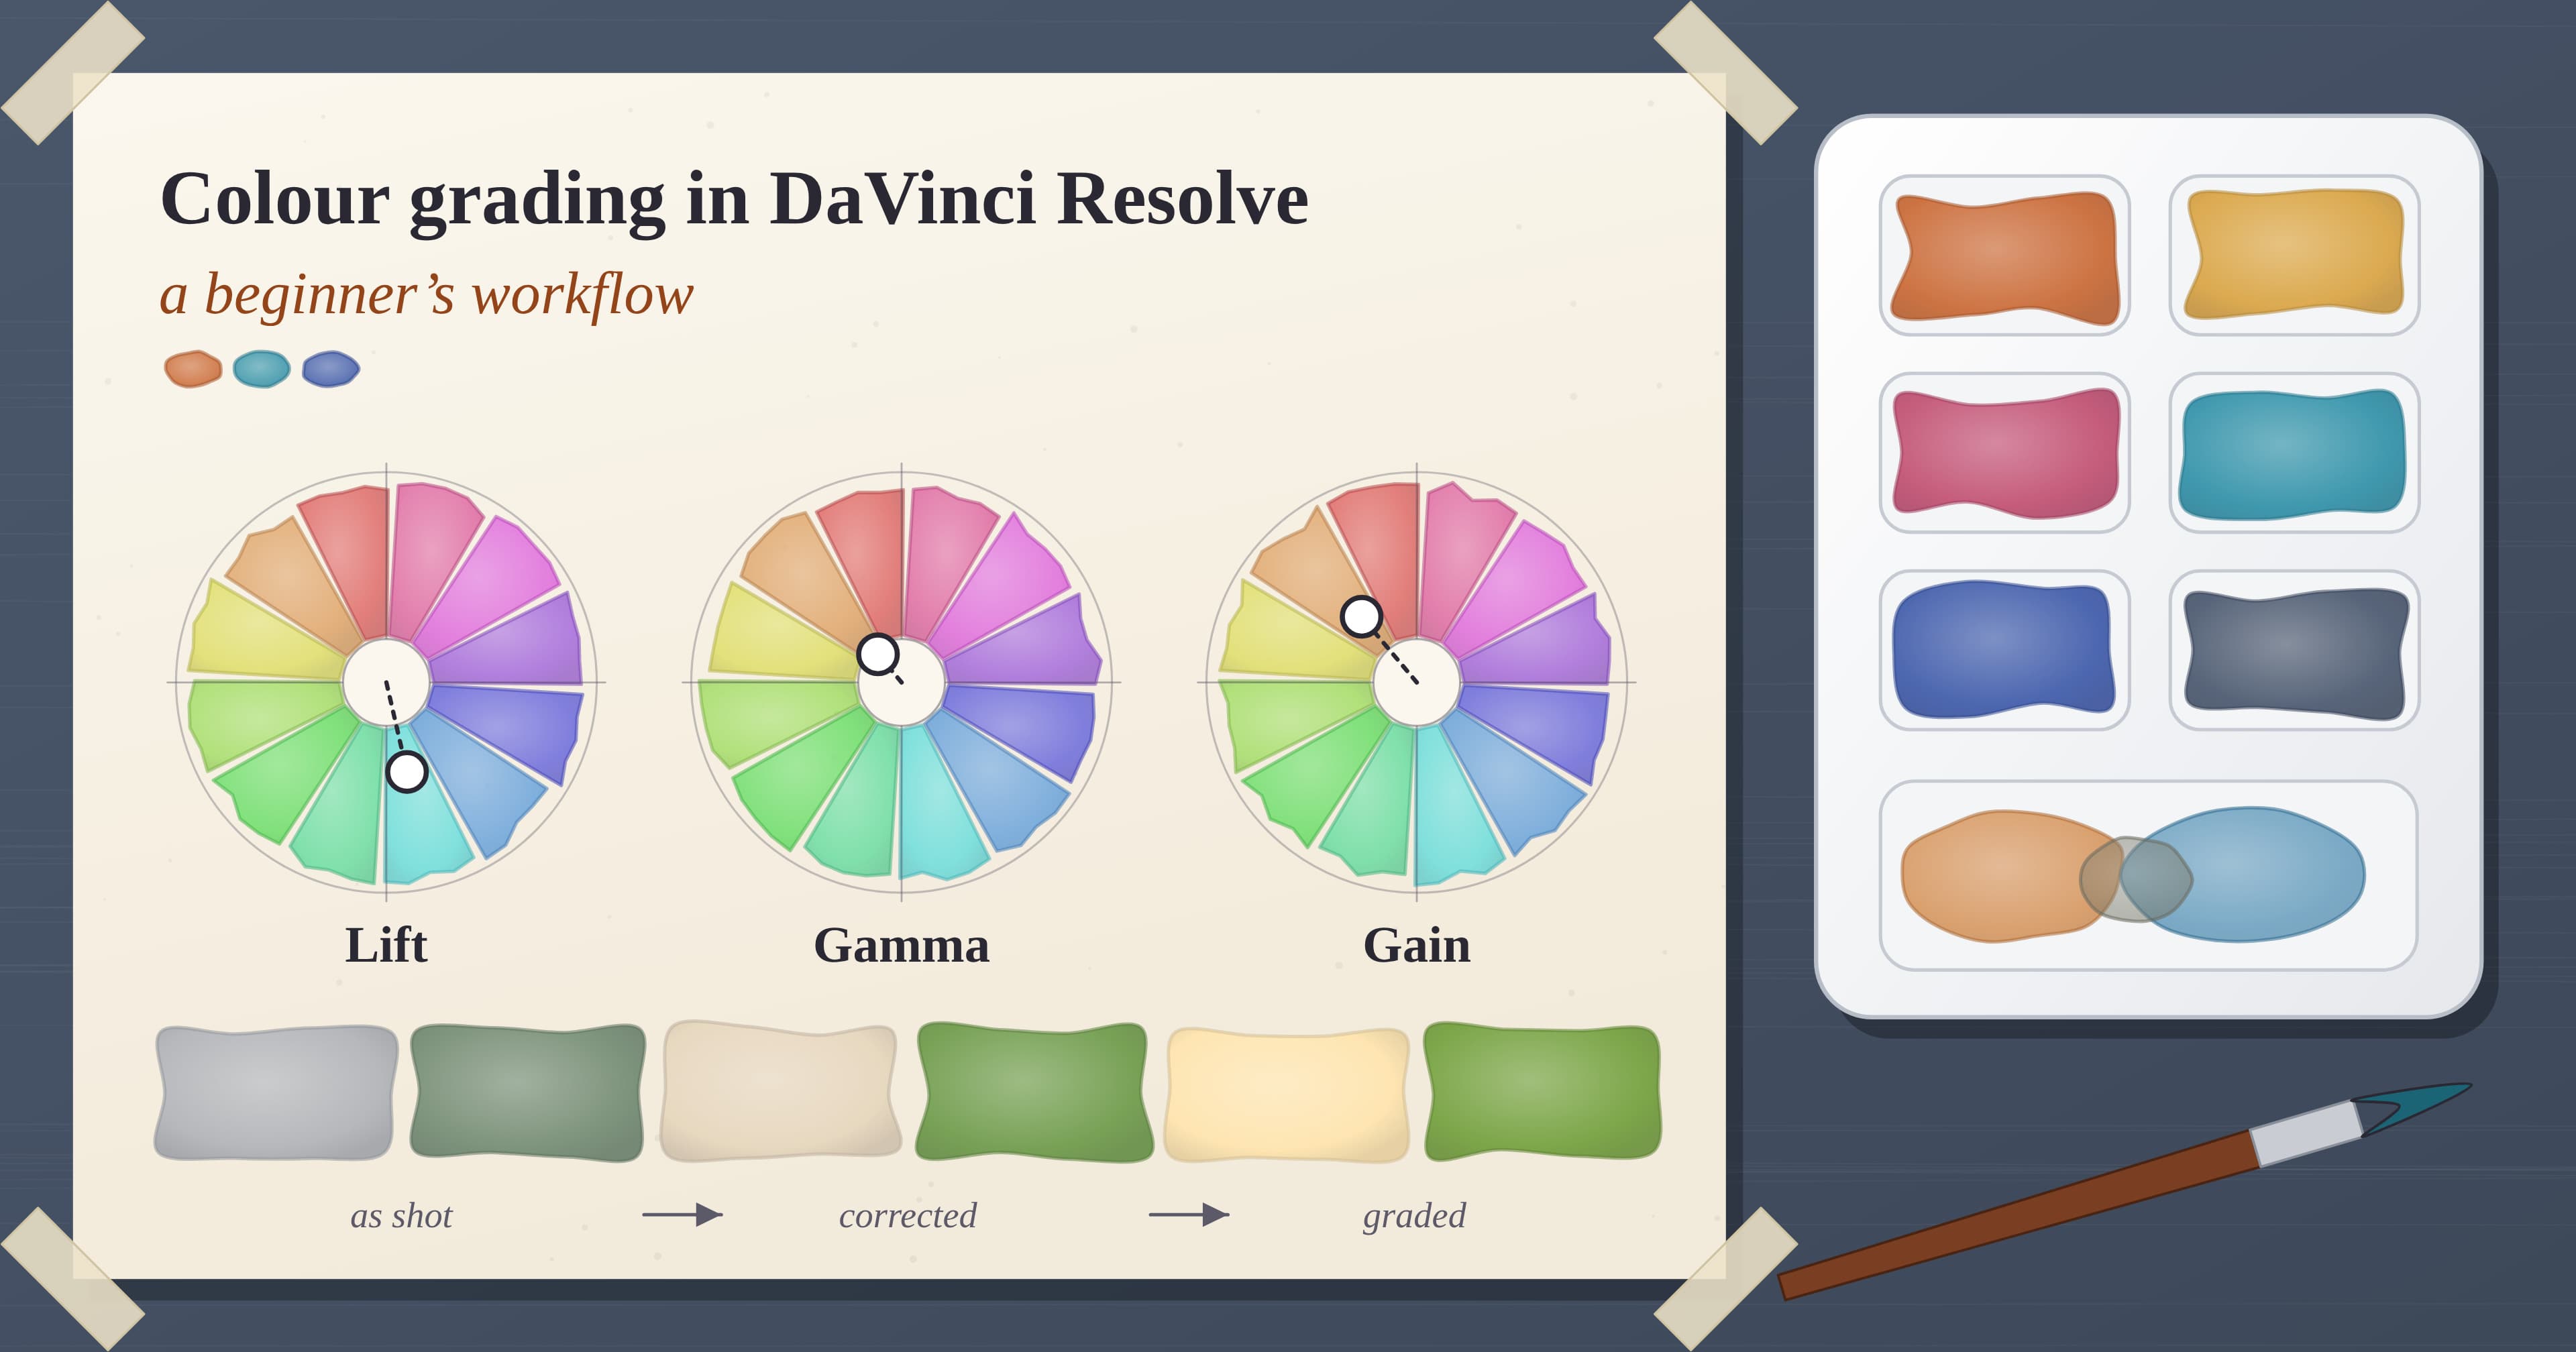
Colour correction and grading. Correction makes shots accurate and consistent. Grading gives them a look. Correct first, then grade.
Log, LUTs and Rec.709. Log footage looks flat by design to keep highlight and shadow detail. A LUT converts it to a standard such as Rec.709, the normal colour space for HD video. Phone HDR clips can look wrong in an HD timeline until the colour settings match.
If you want to go further with colour, our guides to Premiere’s Color Mode and colour grading in DaVinci Resolve pick up where this list stops.
Same idea, different word: Premiere and DaVinci Resolve
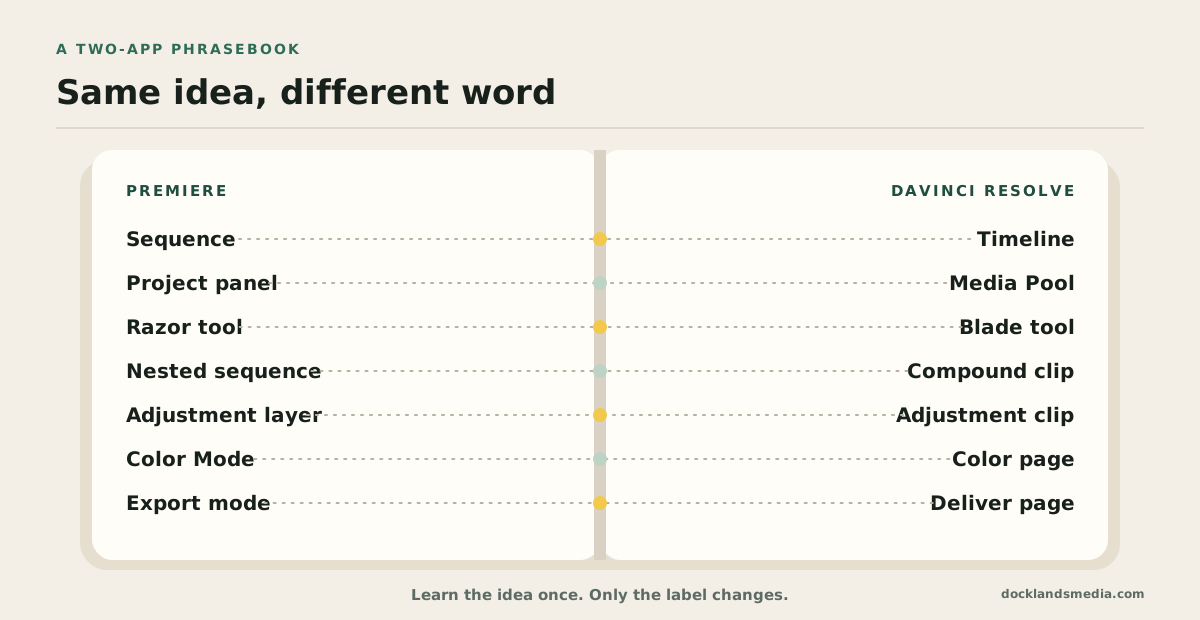
Beginners often worry that choosing the wrong editor means starting again later. The ideas transfer; only the labels change.
Idea | Premiere | DaVinci Resolve |
|---|---|---|
Where clips are stored | Project panel and bins | Media Pool and bins |
Where the edit is built | Sequence | Timeline |
Viewing a clip / the edit | Source Monitor / Program Monitor | Source Viewer / Timeline Viewer |
Cutting a clip in two | Razor tool | Blade tool |
A group of clips treated as one | Nested sequence | Compound clip |
Effect over everything below | Adjustment layer | Adjustment clip |
Changing clip speed | Rate Stretch tool or Speed/Duration | Retime controls or Change Clip Speed |
Colour work | Color Mode | Color page |
Sound work | Essential Sound panel | Fairlight page |
Making the final file | Export mode | Deliver page |
The edit itself can travel too, as both apps exchange timelines through XML, AAF and EDL files. Pick the editor that suits your work and budget, and the vocabulary goes with you. Our comparison of Premiere and DaVinci Resolve covers that choice in more depth.
Which skills should a beginner learn first?
Tutorials tend to teach features in menu order. Editing skills build in a different order, and in our experience people who follow it progress faster:
Organise: folders, bins, sensible names and project settings.
Assemble: three-point edits into a rough cut that tells the story.
Trim for pace: remove pauses, tighten reactions, add cutaways.
Shape the sound: levels, room tone, ducking, J- and L-cuts.
Correct the colour: consistent exposure and white balance, then a look.
Add titles and graphics: lower thirds, captions, end cards.
Export: the right codec, resolution, frame rate and loudness for where it will be shown.
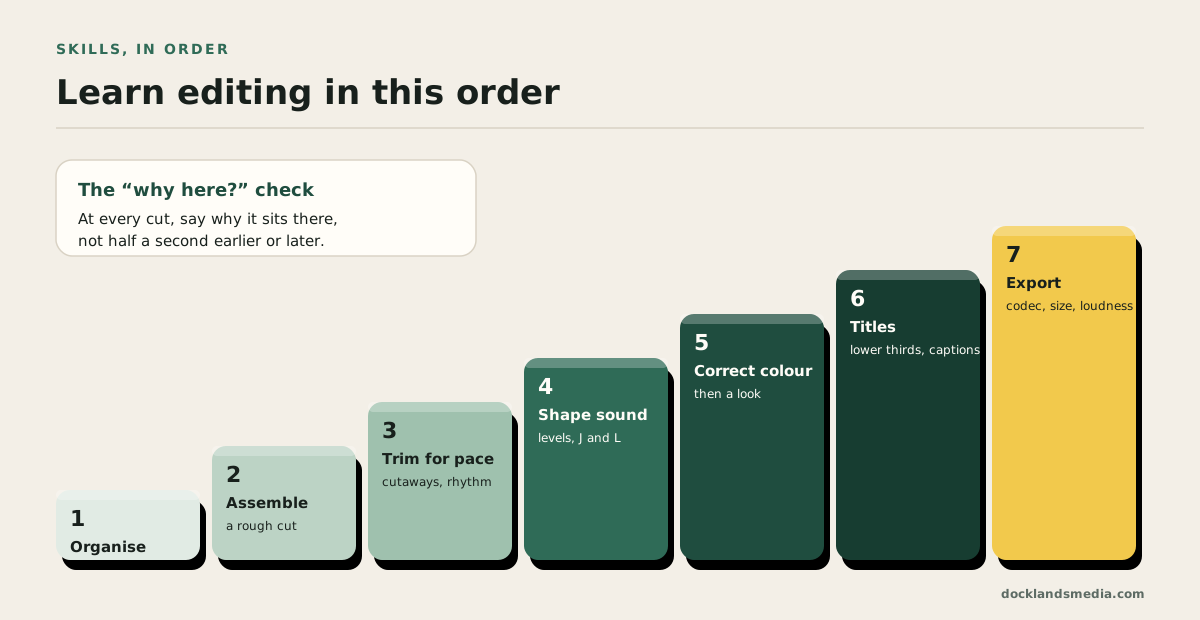
A useful test at each step is the “why here?” check. Play your edit back and, at every cut, say out loud why the cut is there and not half a second earlier or later. Cuts you cannot explain usually feel wrong to a viewer. A good practice brief: cut a two-minute interview to 45 seconds three times, once for meaning, once for rhythm and once with J- and L-cuts throughout, then compare.
For a fuller walk through a single project from import to export, our Premiere for beginners guide follows one job end to end.
Learning editing with Docklands Media
Our two-day beginner courses in Premiere and DaVinci Resolve start with this vocabulary, then work through media, timelines, trimming, sound, colour, titles and export on real projects. Docklands Media is authorised by Adobe and Blackmagic Design, and you can join us in London or online. Every course includes a certificate of completion.
If you want to go from beginner to confident in one block, the five-day Premiere Fast Track Silver and DaVinci Resolve Fast Track Silver combine the Beginner and Intermediate levels. The two Beginner days run back to back, and the three Intermediate days can follow in the same week or a later one. The Premiere Fast Track prepares you to take and pass the Adobe Certified Professional exam at the end of the course. If you would also like to add motion graphics, the Video Bundle: Beginner pairs Premiere with After Effects.